• Skip to primary navigation
  • Skip to main content
  • Skip to primary sidebar
5 Secrets to Mexican Cooking

sign up to get my top 5 secrets to help you master mexican meals at home!

trending now: Healthy Mexican Recipes!
  • About
  • Press/Advertise
  • Contact

Isabel Eats

Easy Mexican recipes for home cooks

  • Recipes
    • All Recipes
    • Course
      • Breakfast
      • Dinner
      • Sides
      • Desserts
      • Appetizers
      • Drinks
      • Soups & Stews
      • Salads
      • Salsas
      • Sauces and Condiments
    • Diet
      • Gluten Free
      • Low Carb
      • Paleo
      • Vegan
      • Vegetarian
    • Meat
      • Beef
      • Chicken
      • Chorizo
      • Pork
      • Turkey
      • Seafood
    • Occasion
      • Christmas
      • Cinco De Mayo
      • Easter
      • Game Day
      • Summer
      • Thanksgiving
    • Type
      • 30 Minute Meals
      • Mexican Basics
      • Freezer Friendly
      • Grilling
      • Healthy
      • Instant Pot
      • Slow Cooker
      • Enchiladas
      • Tacos
  • Dinners
  • Kitchen Tips
  • Life
  • Shop
  • About
  • Subscribe!

    sign up to get my top 5 secrets to help you master mexican meals at home!

Browse by Course/Type/Diet

  • by course
    • Breakfast
    • Dinner
    • Sides
    • Desserts
    • Appetizers
    • Drinks
    • Soups & Stews
    • Salads
    • Salsas
    • Sauces & Condiments
  • by type
    • 30 Minute Meals
    • Mexican Basics
    • Freezer Friendly
    • Grilling
    • Healthy
    • Instant Pot
    • Slow Cooker
    • Enchiladas
    • Tacos
  • by meat
    • Beef
    • Chicken
    • Chorizo
    • Pork
    • Turkey
    • Seafood
  • by diet
    • Gluten Free
    • Low Carb
    • Paleo
    • Vegan
    • Vegetarian
  • by occasion
    • Christmas
    • Cinco De Mayo
    • Easter
    • Game Day
    • Summer
    • Thanksgiving
Jump to latest Browse All Recipes
HomeLifeGardening

How to Thin and Transplant Carrot Seedlings

rate recipe Shareshare
Share on:
33 shares
By: IsabelPosted: 6/24/15

This post may contain affiliate links. Read my disclaimer.

Seeds of Change Garden Carrot Mix

I took a big step last week – I filmed and posted my first ever YouTube video. It’s about, as the title of this post suggests, thinning and transplanting carrot seedlings. If you’re dying to watch it instead of reading the rest of this post, I won’t be offended. Scroll down to the bottom of the page to check it out! And don’t forget to subscribe to my YouTube channel if you like what you see and want more videos!

As you may know, I’m a total beginner to this whole gardening thing. During my childhood, I watched my mom plant loads of ornamentals and house plants, but I don’t really remember her planting any vegetables. My dad, on the other hand, had successfully planted some fruit trees (pears and plums), melons and corn when I was younger, but I never bothered to pay attention to the whole planting and growing process. So even though I was always surrounded by some form of gardening while I was growing up, I wasn’t interested in it AT ALL. Depending on the age, I was either too busy playing video games with my older brothers or dancing to my favorite N’sync or Backstreet Boys CD (yes, that really happened and I’m not ashamed of it).

So how exactly have I learned about gardening? Three ways: a beginner gardening class I took with a local organization called Grow Pittsburgh, reading tons of books and articles and last, but probably my favorite, YouTube videos. Videos are just so much easier than flipping through the back of an index in a gardening book and reading the page(s) under that category, only to find out that your question wasn’t really answered, at least not in the way that you could understand. Also, videos are just fun to watch. Usually. However, as a visual and auditory learner, I do understand the power of reading a set of instructions followed by watching a video of someone actually performing the task. So to that end, below are step-by-step instructions on how to thin carrots and then how to transplant some of those carrot thinnings (if you wish to do so). Haven’t planted any carrot seeds in your garden this year? Don’t worry! There’s still plenty of time. Check out the Garden Carrot Mix seeds from Seeds of Change that I planted in my garden. They’re great and are certified organic!

Seeds of Change Garden Carrot Mix
Tiny Carrot Seeds

How to Thin Carrots

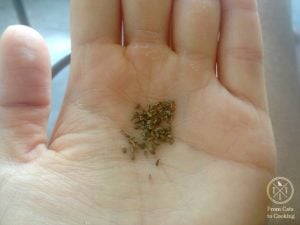
Why thin carrots? Because they need room to grow!  Carrot seeds are so tiny and annoying to deal with that it would be very time consuming to separate individual seeds and plant them 2-4 inches apart. A common way to plant them is to just lay them out in a row using the palm of your hand. This saves you tons of time. Some would argue that it doesn’t save you that much time because you end up having to thin them later. They’re probably right. What can I say? I’m lazy. Anywho, if you were like me and sowed your carrot seeds the lazy way, you’ll know it’s time to thin them out when the carrot tops are about 4 inches tall. Some people do a “first thinning” when the tops are about 2 inches tall and then a “second thinning” when they’re 4 inches tall. You can do that if you’d like. Again, I was just lazy and didn’t do that – I’m just writing about what I did and my experience.

  1. Before you start thinning, make sure to water your growing carrots. The moisture will make it much easier to pull out the seedlings.
  2. Starting from one end of your row of carrots, use a ruler, some other tool or just use your best judgement to measure out 2 inches or so of space between each carrot top.
  3. Once you get to a patch of carrots that are growing too close together, take a close look at which carrot tops look the healthiest – you’ll want to leave those in the ground if possible.
  4. Now comes the hard part – pick a carrot that needs to be pulled out. Sometimes two carrots will be growing so close together that it’s difficult to even distinguish that they are in fact two separate carrots and not one. Just do your best. If you do come across two carrots that are very close together, try to separate them. Otherwise, they won’t grow to their full potential.
  5. Once you’ve chosen a carrot a pull out, firmly grasp the entire carrot top at the very bottom of stem. Make sure you don’t accidentally grab the stem of another carrot.
  6. Gently pull the carrot top straight up.
  7. Continue to do this until there is about 2 inches of space in between each carrot in the row.

How to Transplant Carrot Thinnings

Next comes my little transplanting experiment. Carrot thinnings are not usually transplanted. Why? Well, I think it’s because it’s not usually successful. Nevertheless, I’ve read accounts of others transplanting their carrot thinnings successfully and ending up with beautiful carrots at harvest time. So I decided to go ahead and give it a try. Why not? I’ve got a 50/50 chance, right? Here’s what I did. Make sure you have a pen or pencil on hand that you don’t mind getting dirty.

  1. Pick a spot to transplant your carrot thinning. Make sure you leave about 2 inches of space between other carrots or other plants.
  2. Push your pen/pencil straight down into the soil as far as it can go.
  3. Carefully grab your carrot thinning from the stem, in the same spot as when you pulled the carrot out of the ground.
  4. Place the carrot into the hole, trying not to bend it.
  5. Using your other hand, put some soil around the carrot and gently press it around the carrot to make sure the carrot stays upright and in place.
  6. Repeat the process from the beginning until you’re done.
  7. Gently water your newly transplanted carrot thinning to try to ease their transition.


Be on the lookout for an update on how my transplanted carrot thinnings are doing. I’m pretty nervous about whether they’ll grow or not, but it’s worth a shot!

How to Thin and Transplant Carrots | fromcatstocooking.com

This page contains affiliate links. If you make a purchase on Amazon after clicking one of my links, I may receive a small commission. The price of the item stays the same and any money I make goes to supporting this blog. I only endorse products and services that I fully believe in.

You may also like…

  • How to easily start seedlings indoors with peat pellets. This is a great way for beginner vegetable gardeners to start their seeds indoors for a great start to the gardening season!
    How to Start Seedlings Indoors with Peat Pellets
  • I Have a Garden // fromcatstocooking.com
    I Have a Garden!
  • How to Easily Harvest Kale for Beginners // fromcatstocooking.com
    How to Easily Harvest Kale for Beginners
  • Tuesday Things
    Tuesday Things
free ebook!

download my top 10 recipes book

Subscribe and receive a free e-cookbook of our Top 10 Easy Mexican Recipes!

Get My Copy!

Download my top 10 easy Mexican recipes!

I Have a Garden // fromcatstocooking.com
Previous Post
I Have a Garden!
How to Easily Harvest Kale for Beginners // fromcatstocooking.com
Next Post
How to Easily Harvest Kale for Beginners

Reader Interactions

Leave a Comment Cancel reply

Have a question? Use the form below to submit your question or comment. I love hearing from you and seeing what you made!
Recipe Rating:


  1. Della Mae Johnston says

    Posted on 6/19 at 6:28 am

    Better than a pen or pencil for carrot transplants is the sharp end of a bamboo skewer. It is finer, more precise and disturbs the roots lss.

    Reply
  2. Fishiwe says

    Posted on 9/10 at 11:40 am

    Thanks for the pencil advice. My first crop was carnage with disabled carrots that had bent roots due to short transplant holes. I am now thinning my second crop. Will use the pencil trick to transplant the thinned seedlings. THANKS

    Reply
  3. Twinwaffle says

    Posted on 7/22 at 8:27 am

    I transplanted my thinned carrot “rejects” (the ones I pulled out) around other vegetables growing nearby, and some of them grew into very small carrots, yet some others grew into full-sized ones. I suspect some didn’t make it at all, but I can’t recall. Was worth it though and am doing it again this time.

    Reply
  4. Susan Mains says

    Posted on 6/20 at 3:58 pm

    Instead of a pen or pencil I use a garden fork to make the holes – four at a time.

    Reply
  5. Dana says

    Posted on 5/7 at 4:00 pm

    First one needs to get the soil really wet, then make a much larger hole like with your finger, never let the roots be exposed to the sun so do it one at a time with the hole ready. lay the transplant to one side and then fill with soft wet soil. after all is done water again, a lot. Most will survive and grow to full size. Ya I have done this for a long time, HAPPY GARDENING.

    Reply
  6. Halimah says

    Posted on 4/20 at 12:35 pm

    Hello

    I am a beginner with growing veg
    I had no idea what I was doing and shoved all the seeds in this tiny pot making 5 holes
    They grey really well and then I transported them into a larger deeper pot- they were going so well and growing nicely
    Then I read about thinning
    Basically I had 4 bunches of carrots growing in clumps together
    I have now thinned them all down and re planted them
    But I am worried they won’t survive because they look pretty lifeless. Instead of staying upright they are flopping over
    I guess I’ll have to wait and see what happens

    Reply
    • Michelle says

      Posted on 5/3 at 1:41 pm

      Mine do too! I’m waiting to see what happens

      Reply
  7. Chen says

    Posted on 9/16 at 4:53 pm

    Thanks for the advice! This is my first time planting carrots. We had finally got a planter built, but it was August. We’ll see how it goes! They are almost at the 4″ height you wrote about.
    Thanks!

    Chen

    Reply
  8. Ashley says

    Posted on 7/13 at 6:54 pm

    How did it turn out?! 🙂

    Reply
    • Isabel says

      Posted on 8/8 at 5:16 pm

      About half of the transplanted seedlings grew, and those that did were noticeably smaller than the non-transplanted ones.

      Reply
  9. Terry Dixon says

    Posted on 5/9 at 7:18 am

    Did transplanting carrots work?

    Reply
    • Isabel says

      Posted on 8/8 at 5:16 pm

      About half of the transplanted seedlings grew, and those that did were noticeably smaller than the non-transplanted ones.

      Reply
    • Joanate Ratliff says

      Posted on 5/20 at 3:07 pm

      I was just wondering if your carrot seedlings wilted after being transplanted. If so, about how long did it take you get them back.

      Reply
  10. Karen says

    Posted on 1/4 at 2:38 pm

    So – how did the transplanting work out? Considering starting some seeds inside and curious how it went. Karen

    Reply
  11. Eric Koh says

    Posted on 12/30 at 3:01 am

    Hi Isabel,
    i’m very curious whether your carrots grow well after transplanting? I have transplanted carrots seedlings few months back and to my surprise, those that i have transplanted ended up growing at a much slower pace then the rest.

    Reply
    • Isabel says

      Posted on 8/8 at 5:30 pm

      Hi Eric! I had pretty much the same experience. About half of the transplanted seedlings grew, and those that did were noticeably smaller than the non-transplanted ones.

      Reply
    • Lisa Skinker says

      Posted on 5/24 at 10:31 am

      Do you think leaving the transplanted carrots in the ground longer would allow them to reach their proper size? If so, this would be a great way to get two “harvests”.

      Reply
      • Dori says

        Posted on 2/11 at 10:17 pm

        I sprinkled some Seeds of Change carrot seeds on a whiskey barrel and the all came up so it was a very bushy carrot community. So I thin them out as I need them or to share with my daughter. Then the others just keep getting bigger. I like this process. But I plan to try your transplant suggestion to plant some carrots with my leeks. Thank you!

        Reply
  12. Julia Wilson says

    Posted on 7/27 at 9:16 am

    Hi Isabel,
    Your information was really wonderful. Thank you so much 🙂

    Reply

Primary Sidebar

¡Hola!

i’m isabel

A first-generation Mexican American who loves to cook! Here at Isabel Eats, you’ll find a mix of all your favorite authentic Mexican recipes with a twist! Read More

Notice: JavaScript is required for this content.

free email series!

5 Secrets to Mexican Cooking

My top 5 secrets to help you master Mexican meals at home in no time!

Sign me up!

Sign up to get My top 5 secrets to help you master Mexican meals at home in no time!

Notice: JavaScript is required for this content.

Authentic Recipes

This Mexican Pork Chile Verde is made of tender pieces of pork simmered in a flavorful tomatillo and chile broth. Serve in a bowl or with a side of rice for an authentic Mexican meal! (low carb, gluten free, paleo)

Chile Verde Recipe

Masa for Tamales

Masa for Tamales

Six bolillo breads on a baking sheet ready to eat.

Bolillo Bread (Mexican Rolls)

Pozole verde in a bowl topped with shredded cabbage, sliced radishes, cilantro, and lime juice.

Chicken Pozole Verde

Pozole Rojo (Red Posole) recipe

Pozole Rojo Recipe

Cooked Mexican rice in a pot with peas mixed in.

Authentic Mexican Rice

Reader Favorites

Beef empanadas on a plate served with a side of guacamole.

Beef Empanadas

Chile relleno on a plate with red salsa.

Chile Relleno Recipe

Cooked canned black beans with tomatoes, onions and garlic in a bowl.

How to Cook Canned Black Beans

Chicken enchiladas in a baking dish topped with cilantro.

Easy Chicken Enchiladas

Juicy pork carnitas in warm corn tortillas topped with cilantro, onions and limes.

Easy Carnitas Recipe

Conchas in a bowl ready to be eaten.

Conchas (Mexican Sweet Bread)

Opens in a new window Opens an external site Opens an external site in a new window

5-star faves

Frozen margaritas in glasses topped with lime wedges.

Frozen Margaritas

These were absolutely delicious. So fresh and the perfect amount of sweetness.

A bowl of borracho beans

Borracho Beans

These beans are delicious! Garlic, onion, beer and bacon…you can’t go wrong, lol! I loved these!

Chile Colorado

This recipe is so perfect and delicious. My entire family loved it! Big kudos to you for such an authentic masterpiece!

follow along @isabeleats

Favorites

  • Tacos
  • Sides
  • 30 Minute Meals
  • Desserts
  • Drinks
  • Salsas

Browse By Meat

  • Chicken
  • Beef
  • Pork
  • Seafood
  • Turkey
  • Chorizo
Back to Top
  • About
  • Press
  • Disclaimer
  • Privacy
© 2023 Isabel Eats Site Credits Designed by Melissa Rose Design Developed by Once Coupled