
This post may contain affiliate links. Please read our disclosure policy.
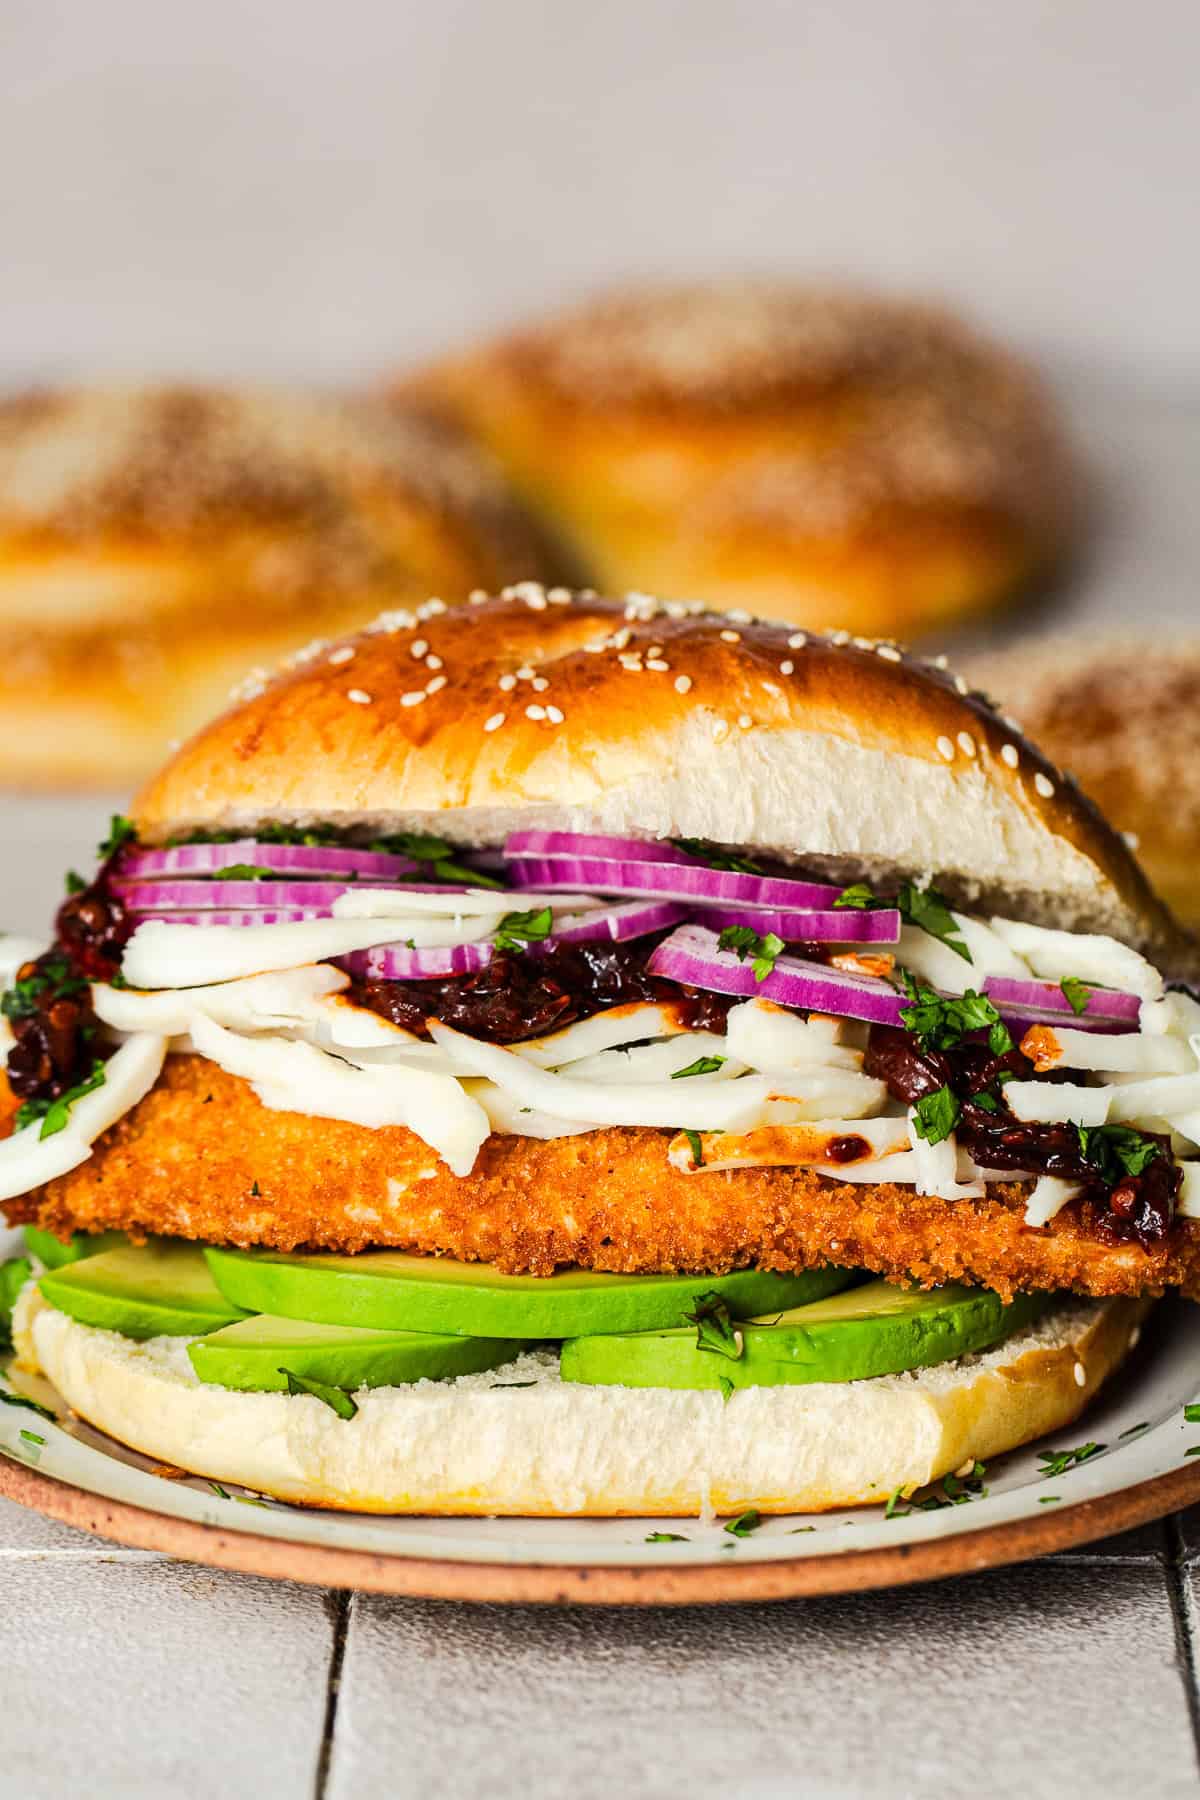
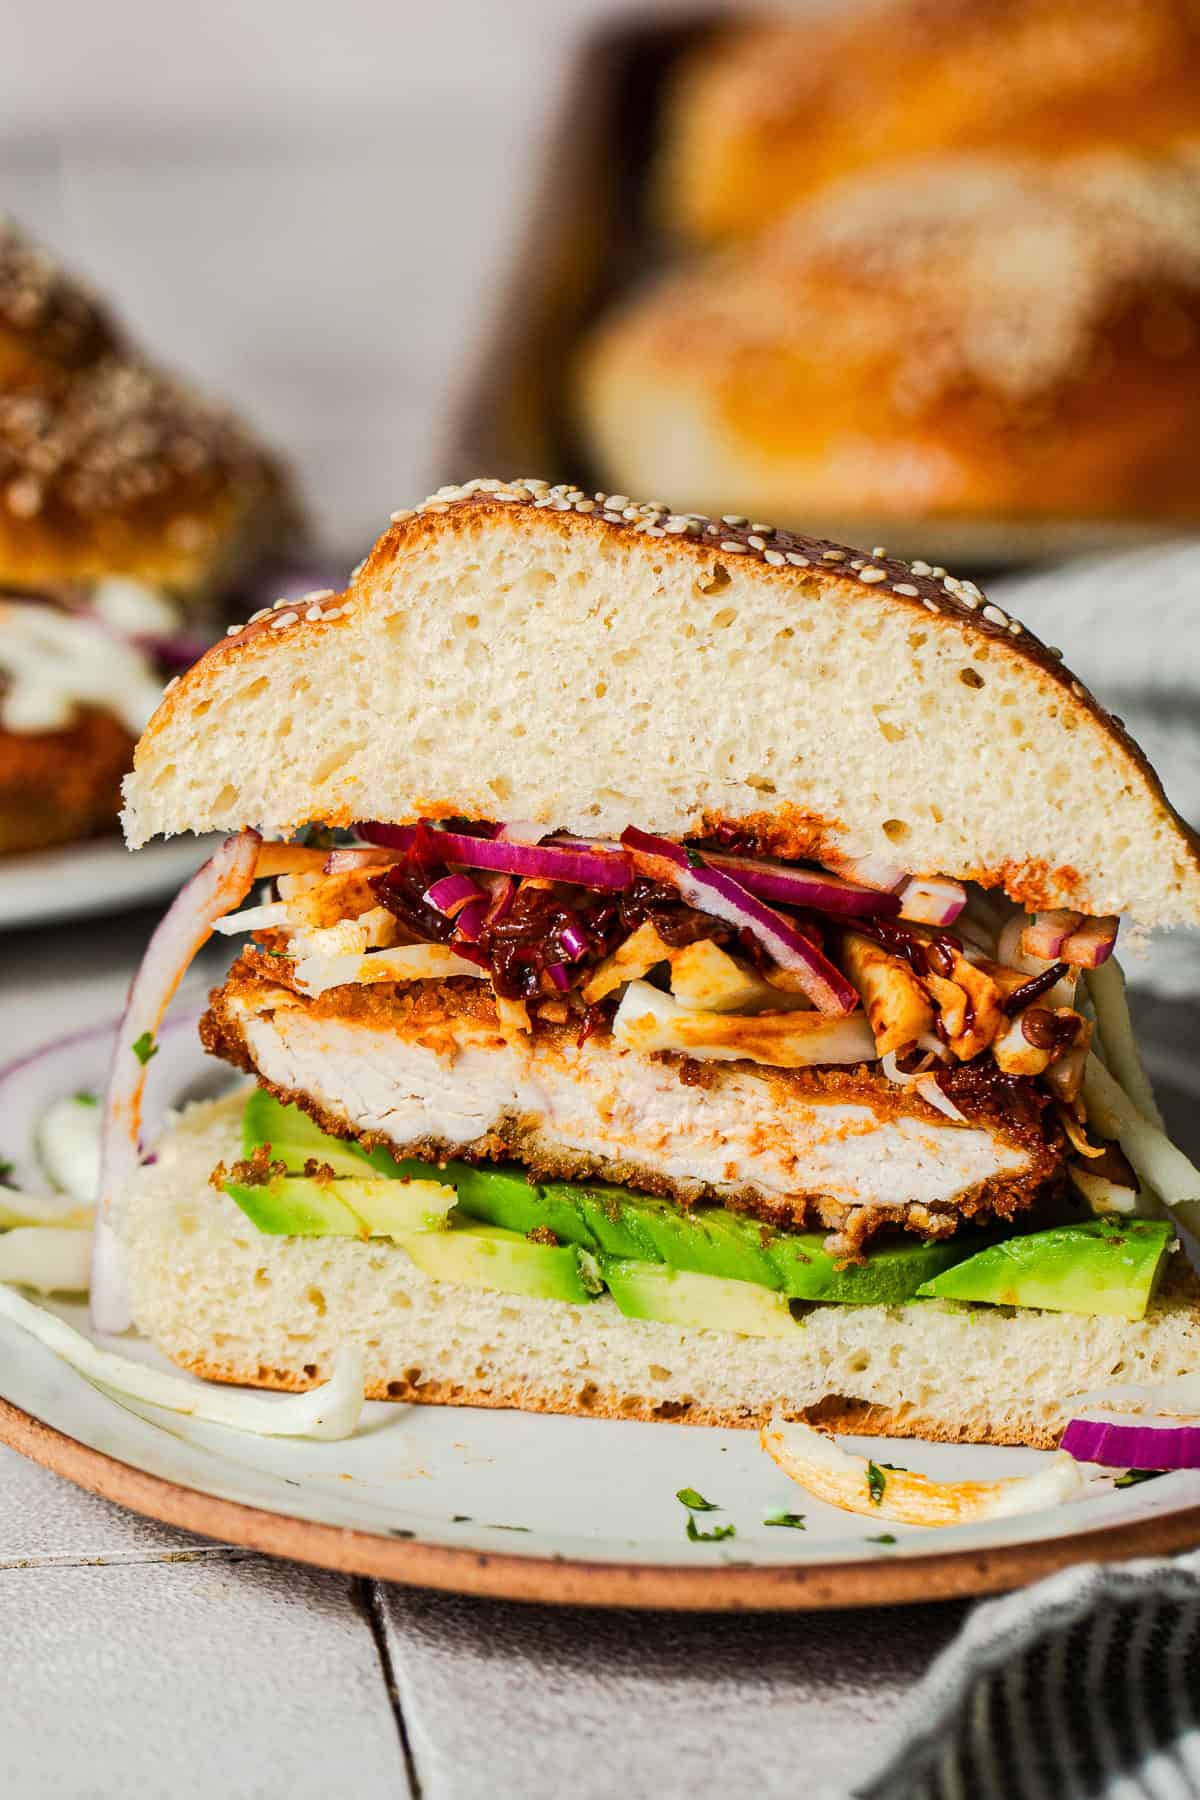
These cemitas poblanas are the Mexican sandwich I can’t go back from: crispy chicken milanesa, creamy avocado, smoky chipotles, onion, and a pile of stringy quesillo on a toasted sesame cemita bun. They come together in about 30 minutes, and one is a full meal on its own.
A Note from Isabel

I’ve eaten a lot of sandwiches in my life, but nothing compares to the size of a cemita poblana. This is a sandwich to end all sandwiches. Think of it as a Mexican fried chicken sandwich that went all out: crispy milanesa, creamy avocado, smoky chipotles, and a mountain of stringy cheese, all piled onto one big bun. I promise you won’t leave hungry after making one.
If you’ve had a Mexican torta, a cemita is its cousin from Puebla. The big difference is the bread. It’s made on a round, fluffy cemita bun covered in sesame seeds, and if you want to go all in, my homemade cemita buns are worth the effort.
For the filling, I make a thin, crispy milanesa de pollo with a seasoned panko crust. Then it gets stacked on a skillet-toasted bun with avocado, chopped chipotles in adobo, sliced onion, and a big pile of pulled quesillo (Oaxaca cheese).
What Are Cemitas Poblanas?
A cemita poblana is a sandwich from Puebla, Mexico. Cemita is the name of the sesame seed bun it’s made on, and poblana just means it’s from Puebla.
The classic version is stacked with a thin milanesa (beef, pork, or chicken), sliced avocado, chipotles, onion, a big pile of pulled quesillo, and pápalo. Pápalo is a bold Mexican herb that tastes a little like cilantro and arugula mixed together, and it can be tricky to find here, so I’ve got a swap for it below.
Ingredients You’ll Need
Here’s what you’ll need, plus a few swaps. Full amounts are in the recipe card below.
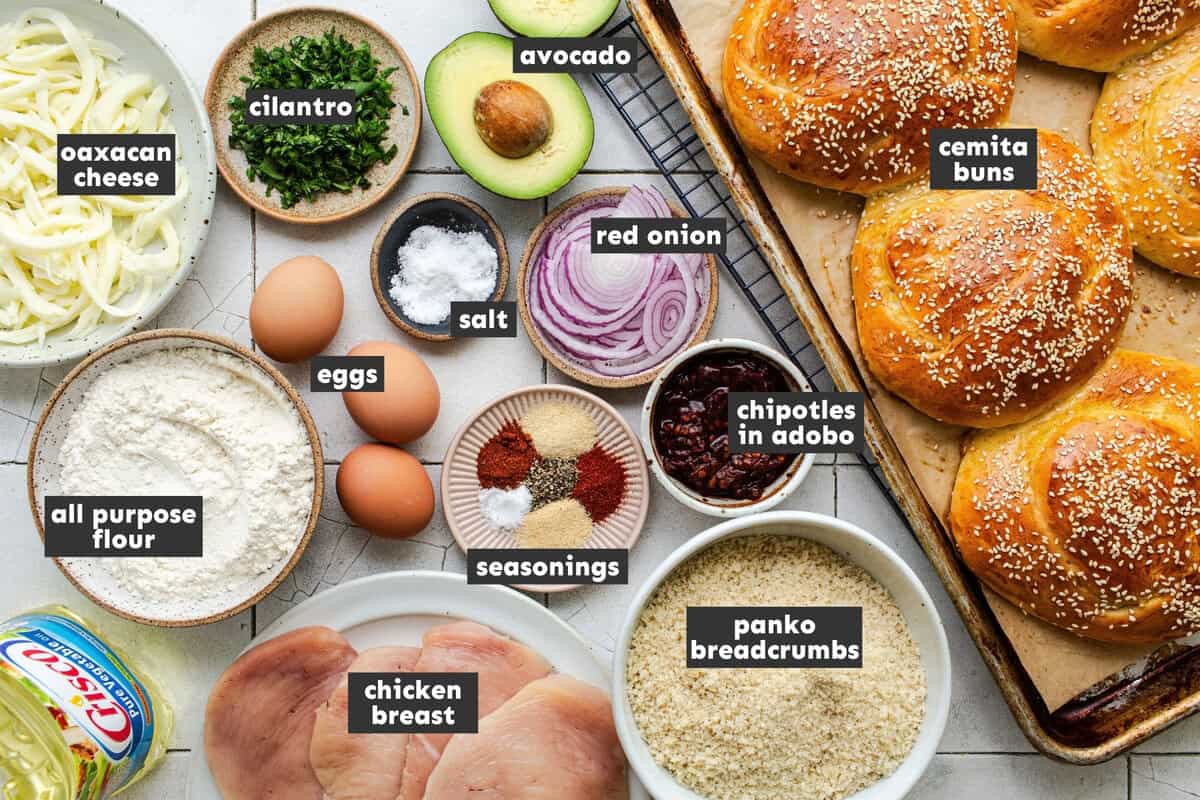
- Chicken breasts: I slice them in half and pound them to about ¼ inch thick so they cook fast and stay tender. Pork or beef cutlets work the same way.
- Panko and dry seasonings: I mix garlic powder, onion powder, chili powder, and smoked paprika right into the panko so the crust has flavor on its own. Regular breadcrumbs work if that’s what you have.
- Cemita buns: Use my homemade cemita buns or grab some from a Mexican bakery. If you can’t find them, a large sesame seed bun works.
- Quesillo/Oaxaca cheese: This mild, stringy cheese gets pulled into thin strands. Most Mexican grocery stores carry it, and a lot of regular ones do too. If you can’t find it, mozzarella works, or grab some string cheese and pull it apart into strands.
- Chipotles in adobo: I chop the peppers and add a little of the sauce for smoky heat. Salsa morita or pickled jalapeños are both great swaps.
- Pápalo or cilantro: Pápalo is the traditional herb, but it’s hard to find, so cilantro is an easy swap.
- Avocado and onion: Use red onion for a sharper bite or white onion if you like it milder.
How to Make Cemitas Poblanas
Here’s the quick version. The full step-by-step is in the recipe card below.
- Pound the chicken. Slice the chicken breasts in half, cover them with plastic wrap or parchment, and pound them to about ¼ inch thick.
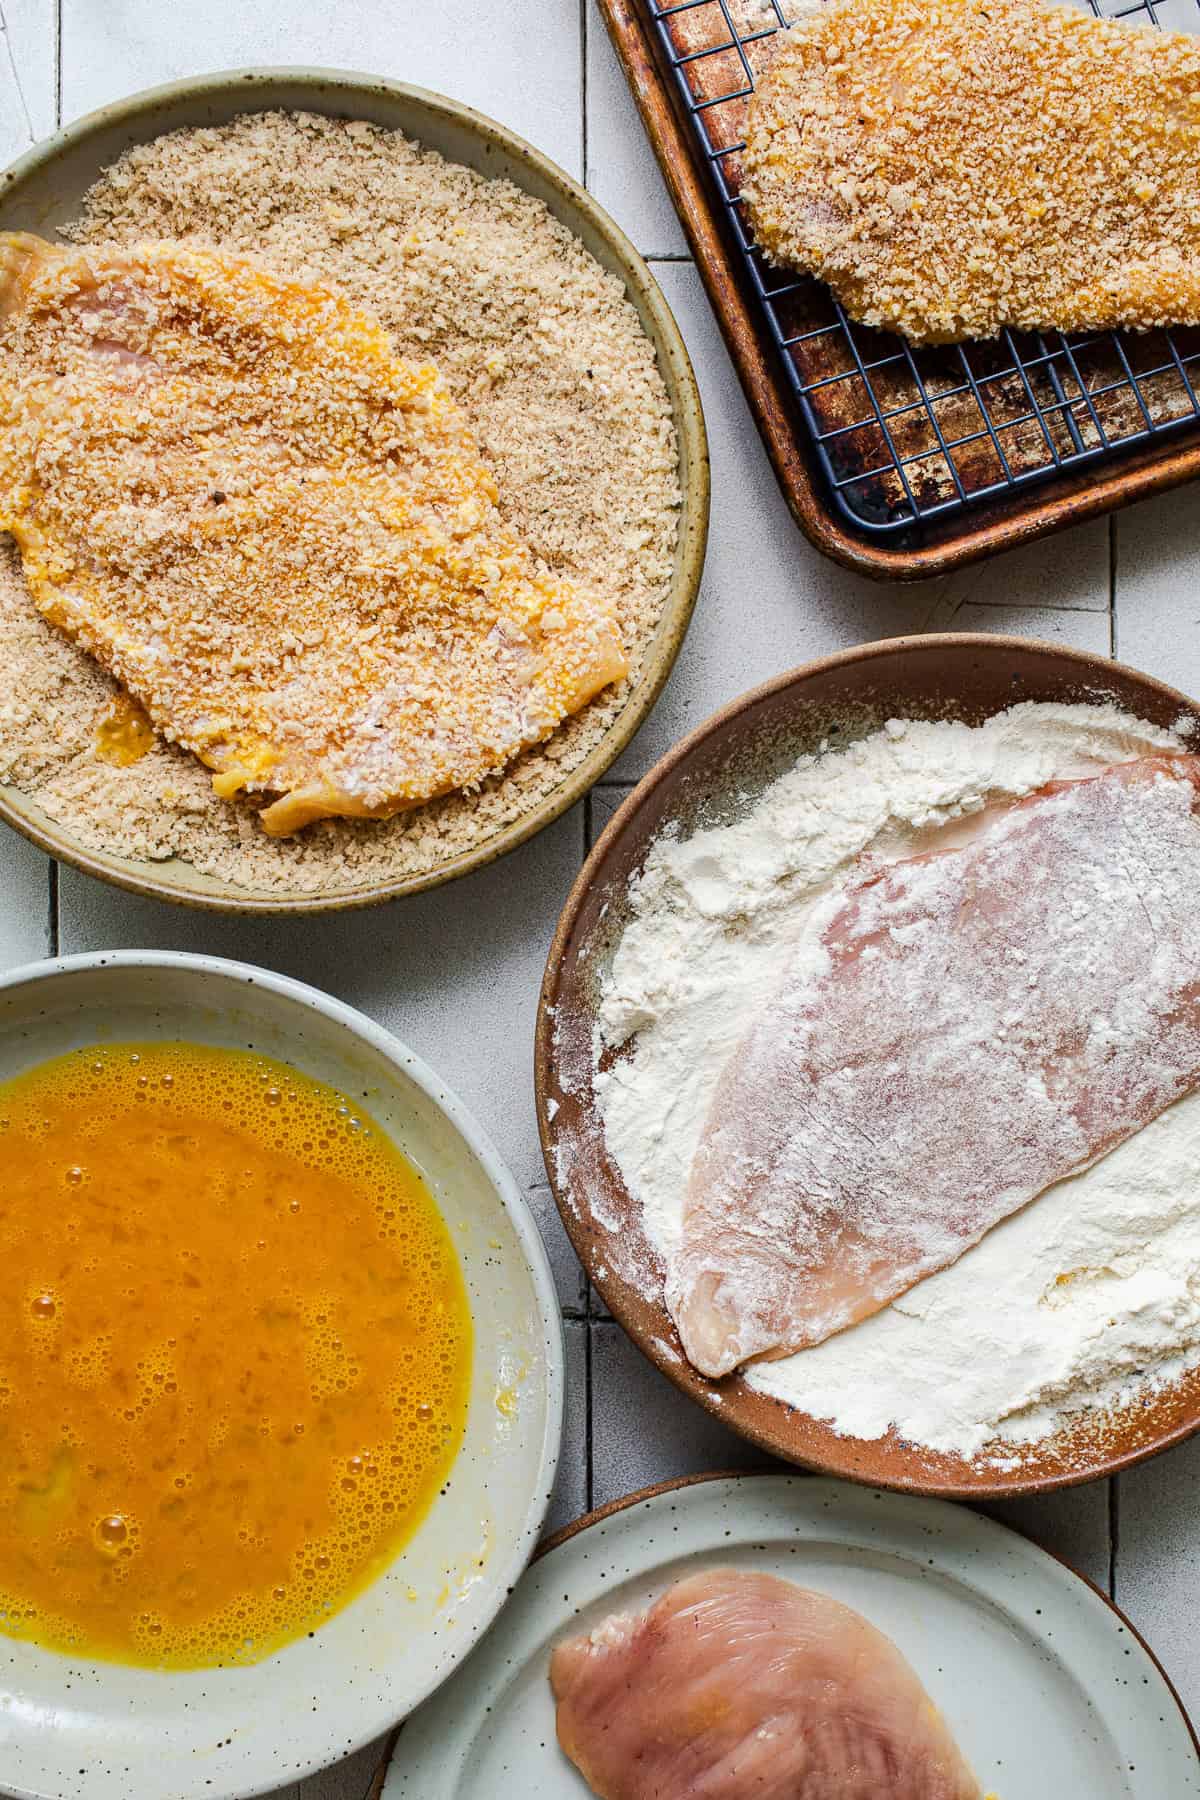
- Bread the milanesa. Dredge each piece in salted flour, dip it in the egg, then press it into the seasoned panko so both sides are fully coated.
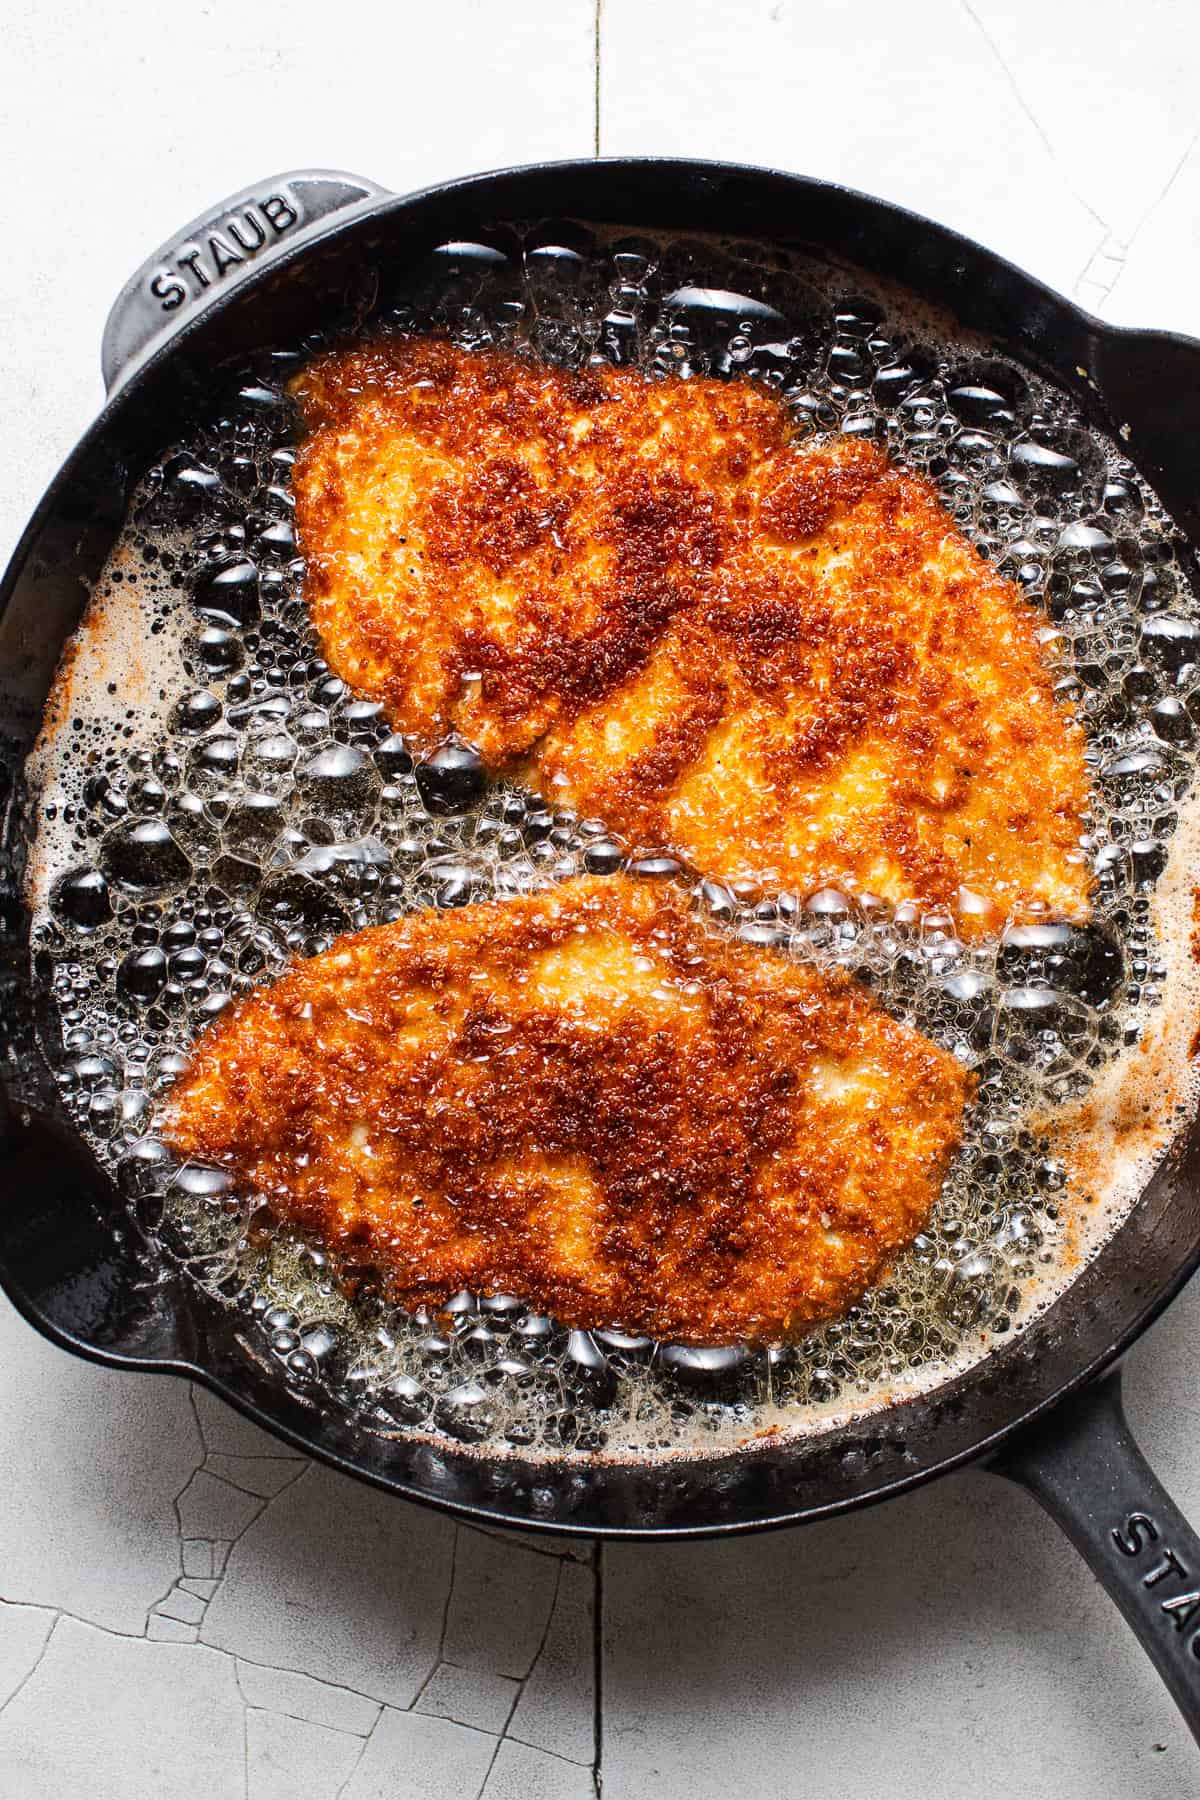
- Fry. Shallow fry the milanesa two at a time for 3 to 4 minutes per side, until golden and crispy. Let them drain on a paper towel-lined plate.
- Toast and assemble. Toast the buns cut side down in a skillet, dry or with a little butter. Then layer avocado, milanesa, quesillo, chipotles, onion, and cilantro, and top with a pinch of flaky salt.
Recipe Tips
- Fry in small batches. I only fry two pieces at a time. Crowding the pan cools the oil down, and that’s how you end up with a greasy crust instead of a crispy one.
- Pull the cheese as thin as you can. Some people can pull quesillo into super thin threads. Mine never come out quite that thin, and it’s still amazing, so just do your best.
- Assemble right before eating. The milanesa stays crispiest when it goes straight from the pan onto the bun.
Cemitas Poblanas FAQs
It’s all about the bread. A torta is usually made on a bolillo or telera roll, while a cemita sandwich is made on a round, fluffy bun covered in sesame seeds. The fillings can overlap, but a cemita poblana almost always comes with milanesa, quesillo, avocado, and chipotles.
Check your local Mexican bakery first. If you can’t find them, you can make my homemade cemita buns or use a large sesame seed bun instead.
You can fry the milanesa ahead and keep it in the fridge for up to 3 days. Reheat it in the air fryer for about 5 minutes so it crisps back up, then build the sandwiches fresh.
They’re filling enough to be a meal on their own, but I love them with a cold agua fresca like horchata, agua de jamaica, or agua de pepino.
Cemitas Poblanas
Ingredients
For the milanesa
- Vegetable oil, for frying (avocado, canola, or grapeseed are great)
- 1 cup all-purpose flour
- 2 teaspoons fine salt, divided
- 3 large eggs
- 2 cups panko breadcrumbs
- ½ teaspoon black pepper
- ½ teaspoon garlic powder
- ½ teaspoon onion powder
- ½ teaspoon chili powder
- ½ teaspoon smoked paprika
- 2 large boneless skinless chicken breasts, sliced in half lengthwise
For the cemitas poblanas
- 4 cemita buns (or large sesame seed buns), split in half
- Butter, for toasting (optional)
- 2 avocados, sliced
- ½ white or red onion, thinly sliced
- ½ bunch pápalo or cilantro sprigs, roughly chopped
- 6 chipotle peppers plus adobo sauce, roughly chopped
- 4 ounces Oaxaca cheese/quesillo, pulled into thin strands or shredded
- Flaky sea salt, for garnishing
Instructions
- Prepare the ingredients. Heat 1½ to 2 inches of oil in a large skillet over medium-high heat.
- Meanwhile, prepare three separate shallow bowls or plates. In one shallow bowl, mix together the flour and 1 teaspoon of the fine salt.
- In a second shallow bowl, whisk together the eggs with ½ teaspoon of the fine salt.
- In a third shallow bowl, combine the panko, the remaining ½ teaspoon of fine salt, the black pepper, garlic powder, onion powder, chili powder, and smoked paprika.
- Line a large cutting board with plastic wrap or parchment paper. Lay the chicken breasts on top in a single layer, and then cover with another piece of plastic wrap or parchment paper.
- Using a meat mallet or a heavy cast iron skillet, pound each chicken breast to about ¼-inch thickness.
- Coat the chicken. Working with one chicken breast at a time, dredge it in the flour mixture to coat both sides, shaking off any excess flour. Then dip both sides into the egg mixture, and finally into the breadcrumb mixture, pressing down lightly to fully coat both sides.
- Fry. Working in batches of 2, shallow-fry the milanesa for 3 to 4 minutes per side, until golden and crispy. Transfer to a plate lined with paper towels to soak up any excess grease. Repeat with the remaining chicken.
- Toast the buns. Toast the buns cut side down in a skillet over medium heat, dry or with a little butter, until golden, about 1 to 2 minutes.
- Assemble the cemitas poblanas. Spread a layer of avocado slices on the bottom half of a cemita bun, then add the chicken milanesa, 1 ounce of quesillo, a spoonful of chopped chipotles in adobo, sliced onion, a sprinkle of pápalo or cilantro, and a sprinkle of flaky sea salt. Press the top half of the bun on top and repeat until they have all been assembled. Serve immediately.
Notes
- Storage: Store leftover milanesa and the toppings separately in the fridge for up to 3 days. Reheat the milanesa in the air fryer for about 5 minutes so it crisps back up, then build the sandwiches fresh.
- Doneness: The chicken is done when it hits 165°F inside. Since it’s pounded thin, it usually gets there right as the crust turns golden.
- Pápalo swap: Pápalo can be hard to find, even at Mexican grocery stores, so cilantro works as an easy swap.
- Cheese swap: If you can’t find quesillo/Oaxaca cheese, use mozzarella or pull string cheese apart into thin strands.
- Chipotle swap: Salsa morita or pickled jalapeños both work in place of the chipotles.
- Meat swap: Pork or beef cutlets pounded to ¼ inch work the same way. Fry them until golden and cooked through.
Nutrition
Nutrition information is automatically calculated, so should only be used as an approximation.
More Recipes To Try
Photography by Ashley McLaughlin.