

This post may contain affiliate links. Please read our disclosure policy.
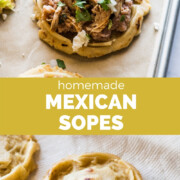
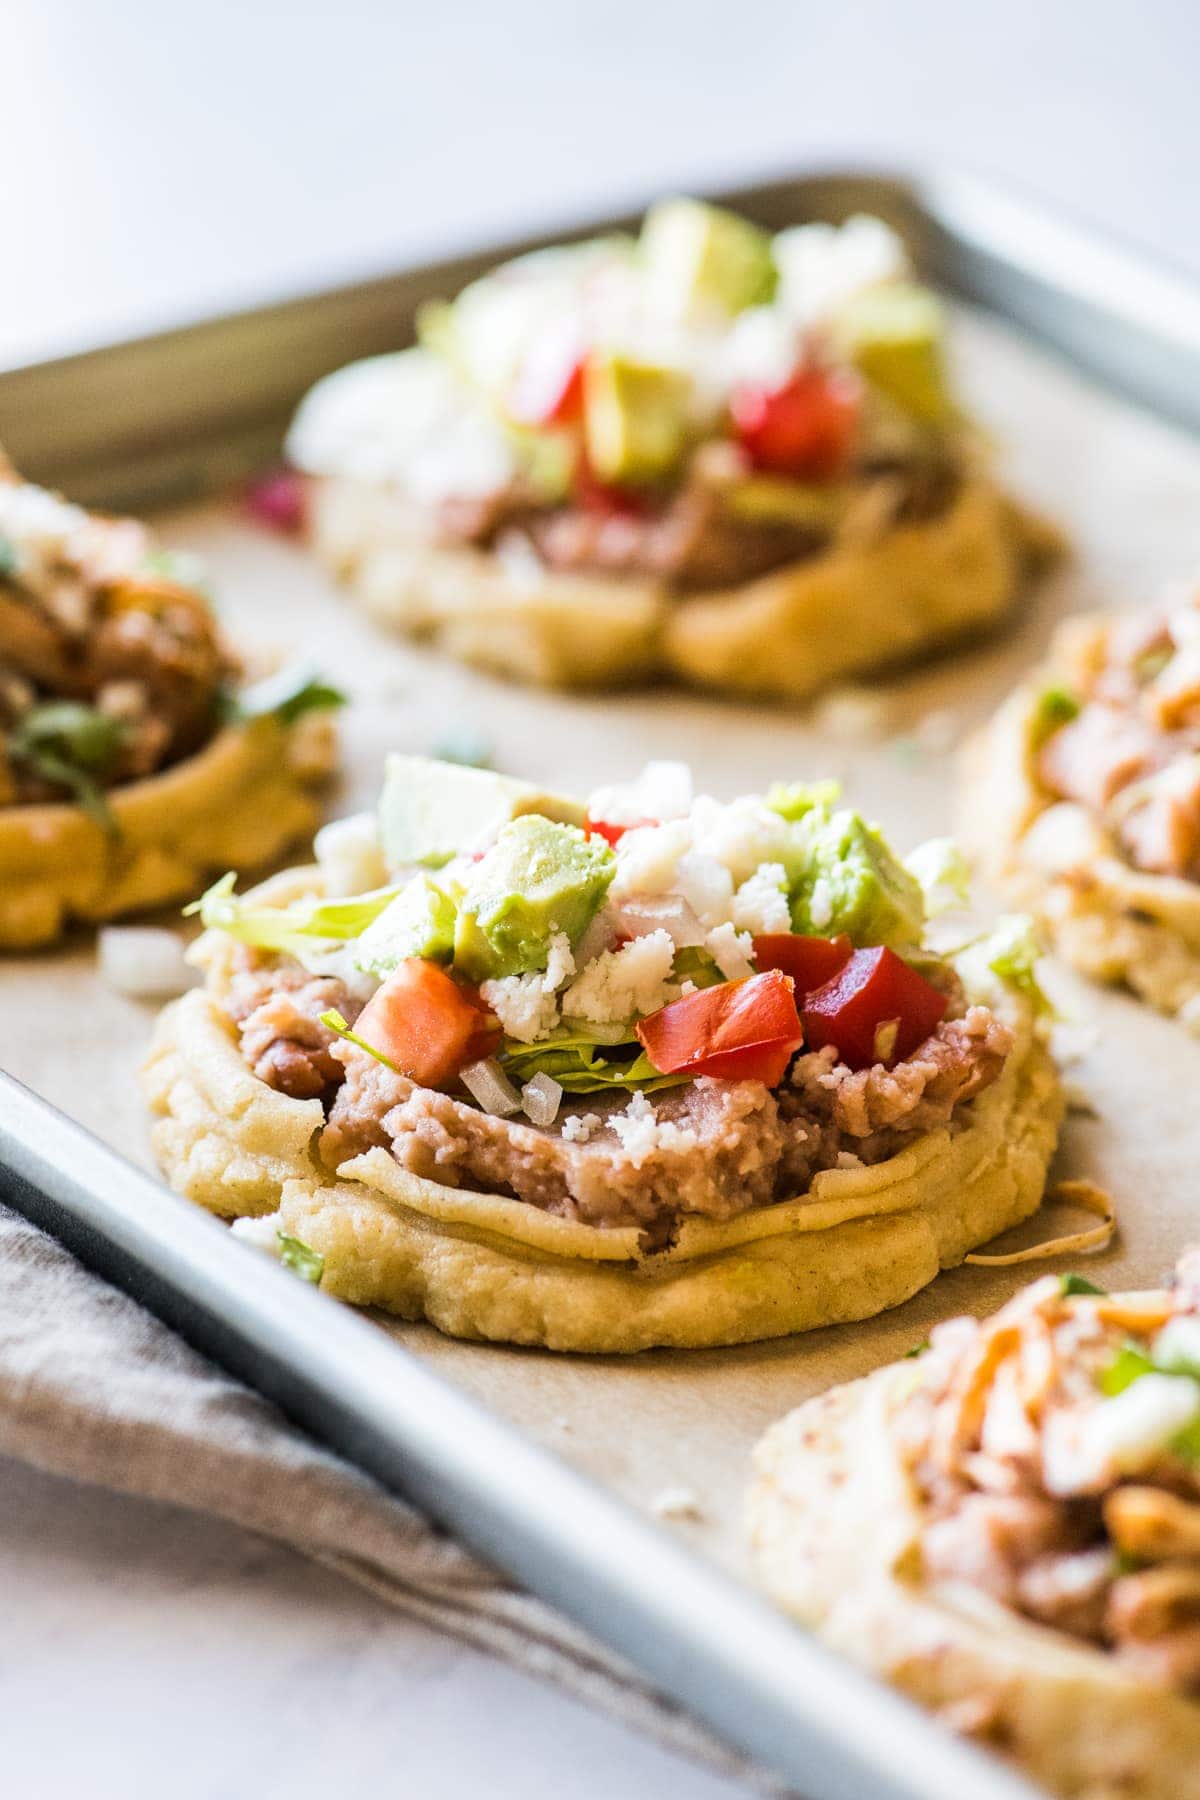
These Mexican sopes are the ones I grew up eating, made by both my mom and my dad. They’re thick masa cakes with a little pinched rim, pan-cooked until slightly crisp outside and soft inside, or fried the way my grandma did in Mexico. Pile them with refried beans, chorizo, cheese, and salsa.
A Note from Isabel
Mexican sopes were a staple in my house growing up. My mom and dad both made them all the time, and I think it’s because you can put just about anything on top. Their go-to was refried beans, cheese, and shredded chicken or ground beef. Mine is refried beans and chorizo. So good.
If you’ve never had one, a sope is kind of like a tostada, except it’s made from masa, so it’s not a big crunchy chip. It’s a thick corn cake with a little lip around the edge, slightly crisp on the outside and soft in the middle. That rim is what lets you pile the toppings high.
My parents almost always pan-cooked theirs, but whenever we visited my grandma in Mexico, she preferred to fry them. I’m sharing both ways below.
What Are Sopes?
Sopes (pronounced soh-pez) are small, thick corn cakes made from masa, with a pinched rim around the edge that holds all the toppings in. They’re an antojito, which is what we call the snacks and little bites you find at street stands and markets all over Mexico.
If you know other masa dishes, here’s how sopes compare:
- Tostadas: A thin tortilla fried until crunchy, with no rim.
- Gorditas: Also thick masa cakes, but they’re split open and stuffed like a pocket.
- Huaraches: Long and oval like a sandal, which is what huarache means, with toppings on the flat surface.
- Tlacoyos: Oval and stuffed with beans before they’re cooked.
Sopes Ingredients
You only need three simple ingredients to make sopes at home. The full amounts are in the recipe card below.
- Masa harina: This is dried corn flour made for tortillas and tamales, and it’s what gives sopes their corn flavor. You can use white, yellow, or blue corn varieties. They all work great.
- Warm water: Helps the masa harina hydrate faster so the dough comes together soft, not crumbly.
- Salt: Just a little fine salt seasons the dough so the sopes taste good even before the toppings go on.
If you want to fry your sopes, you’ll also need some vegetable oil. For the pan-cooked, no-fry method, you can skip it.
How to Make Sopes
Here’s the quick version with photos. The full instructions are in the recipe card below.
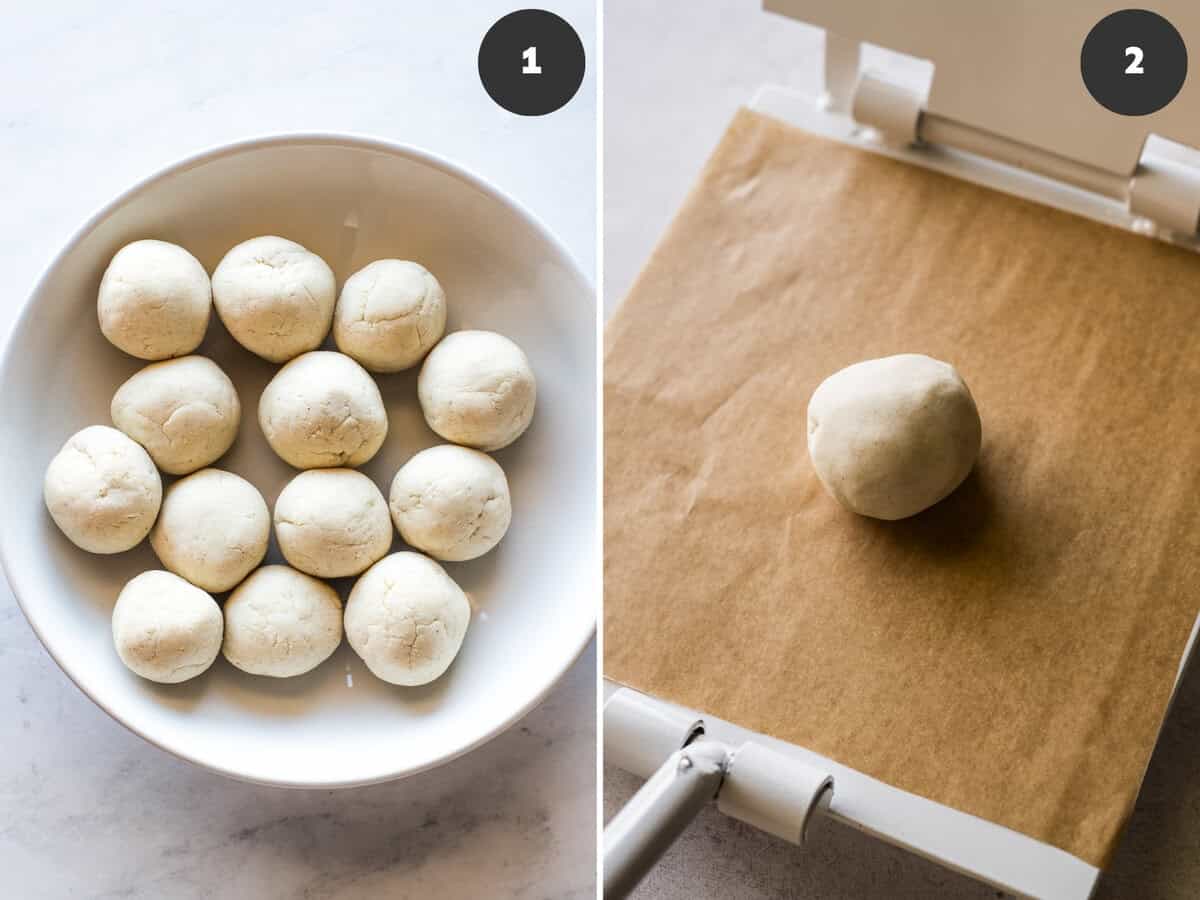
1. Roll into balls. Divide the dough into 12 pieces and roll each one into a ball. Keep them covered with a damp towel so they don’t dry out.
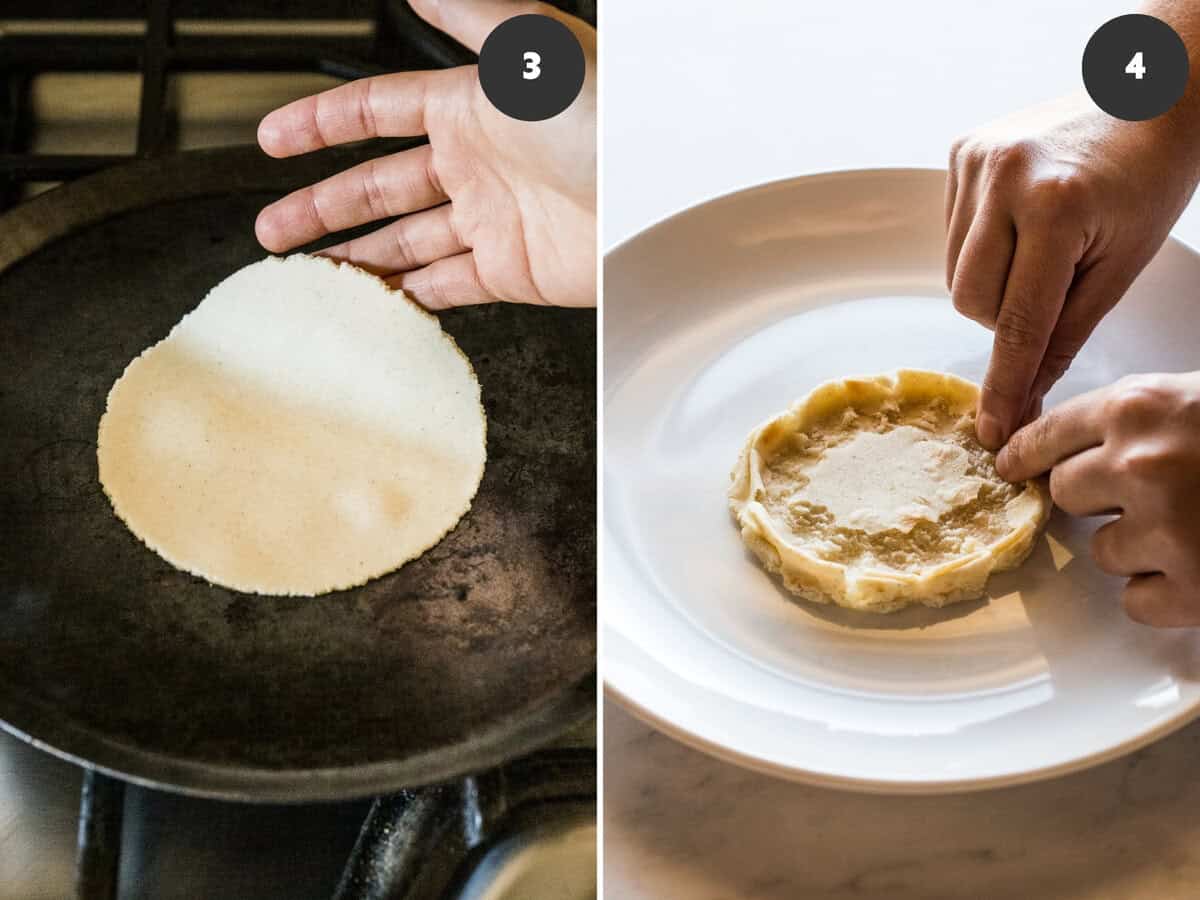
2. Press them thick. Use a tortilla press lined with a cut-open zip-top bag or parchment paper. Press gently, since you want them a little thicker than a corn tortilla.
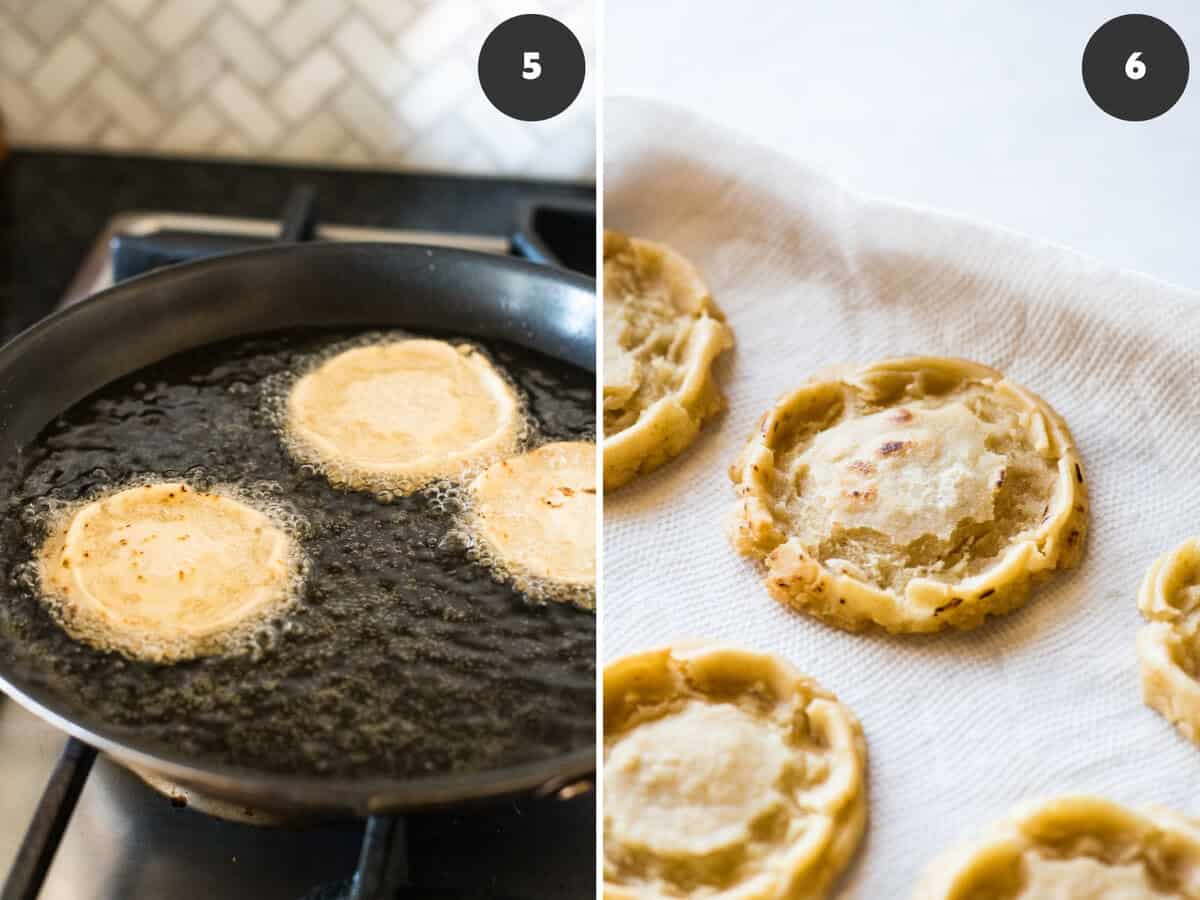
3. Sear. Cook each one on a hot griddle for 1 minute per side.
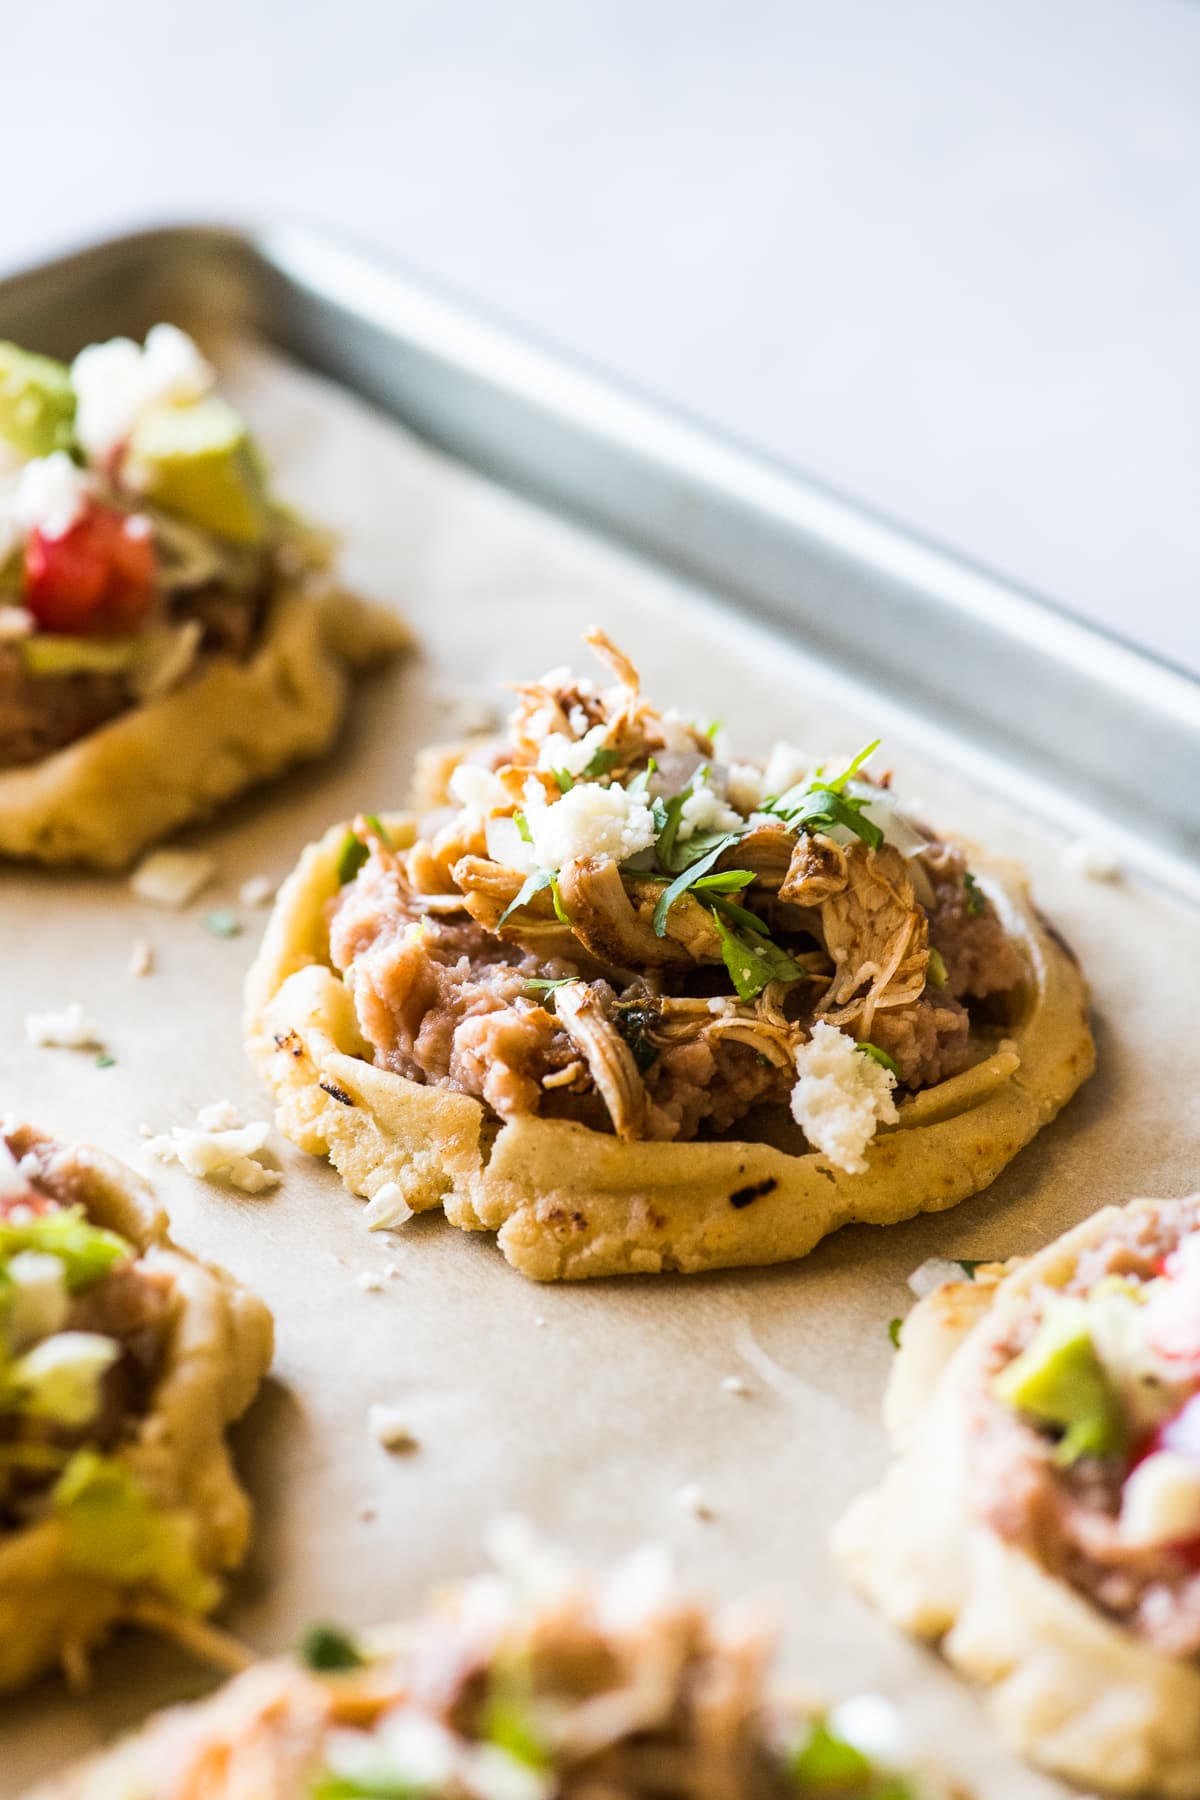
4. Pinch the rim. Move it to a cutting board or plate and let it cool for a few seconds, just until you can touch it, then pinch the edges all the way around to make a rim. My family always does this with bare fingers, but if it’s too hot for you, pinch through a kitchen towel.
5. Finish them. Put the sopes back on the griddle for 1 more minute per side. You can also bake them all at once at 400°F for 5 minutes, or fry them in hot oil for about 2 minutes to get them extra crispy.
6. Top and eat. Pile on your desired toppings and eat immediately.
Tips for the Best Sopes
- Don’t press them too thin. Sopes need some thickness to hold a rim and all those toppings. If you over-flatten one, just roll it back into a ball and press it again.
- Pinch the rim while they’re warm. The dough is easiest to shape right after it comes off the griddle. If it cools too long, it won’t pinch and will just crack and crumble.
- Keep them covered. Place the finished sopes under a clean kitchen towel so they stay soft inside while you work through the batch.
Toppings for Sopes
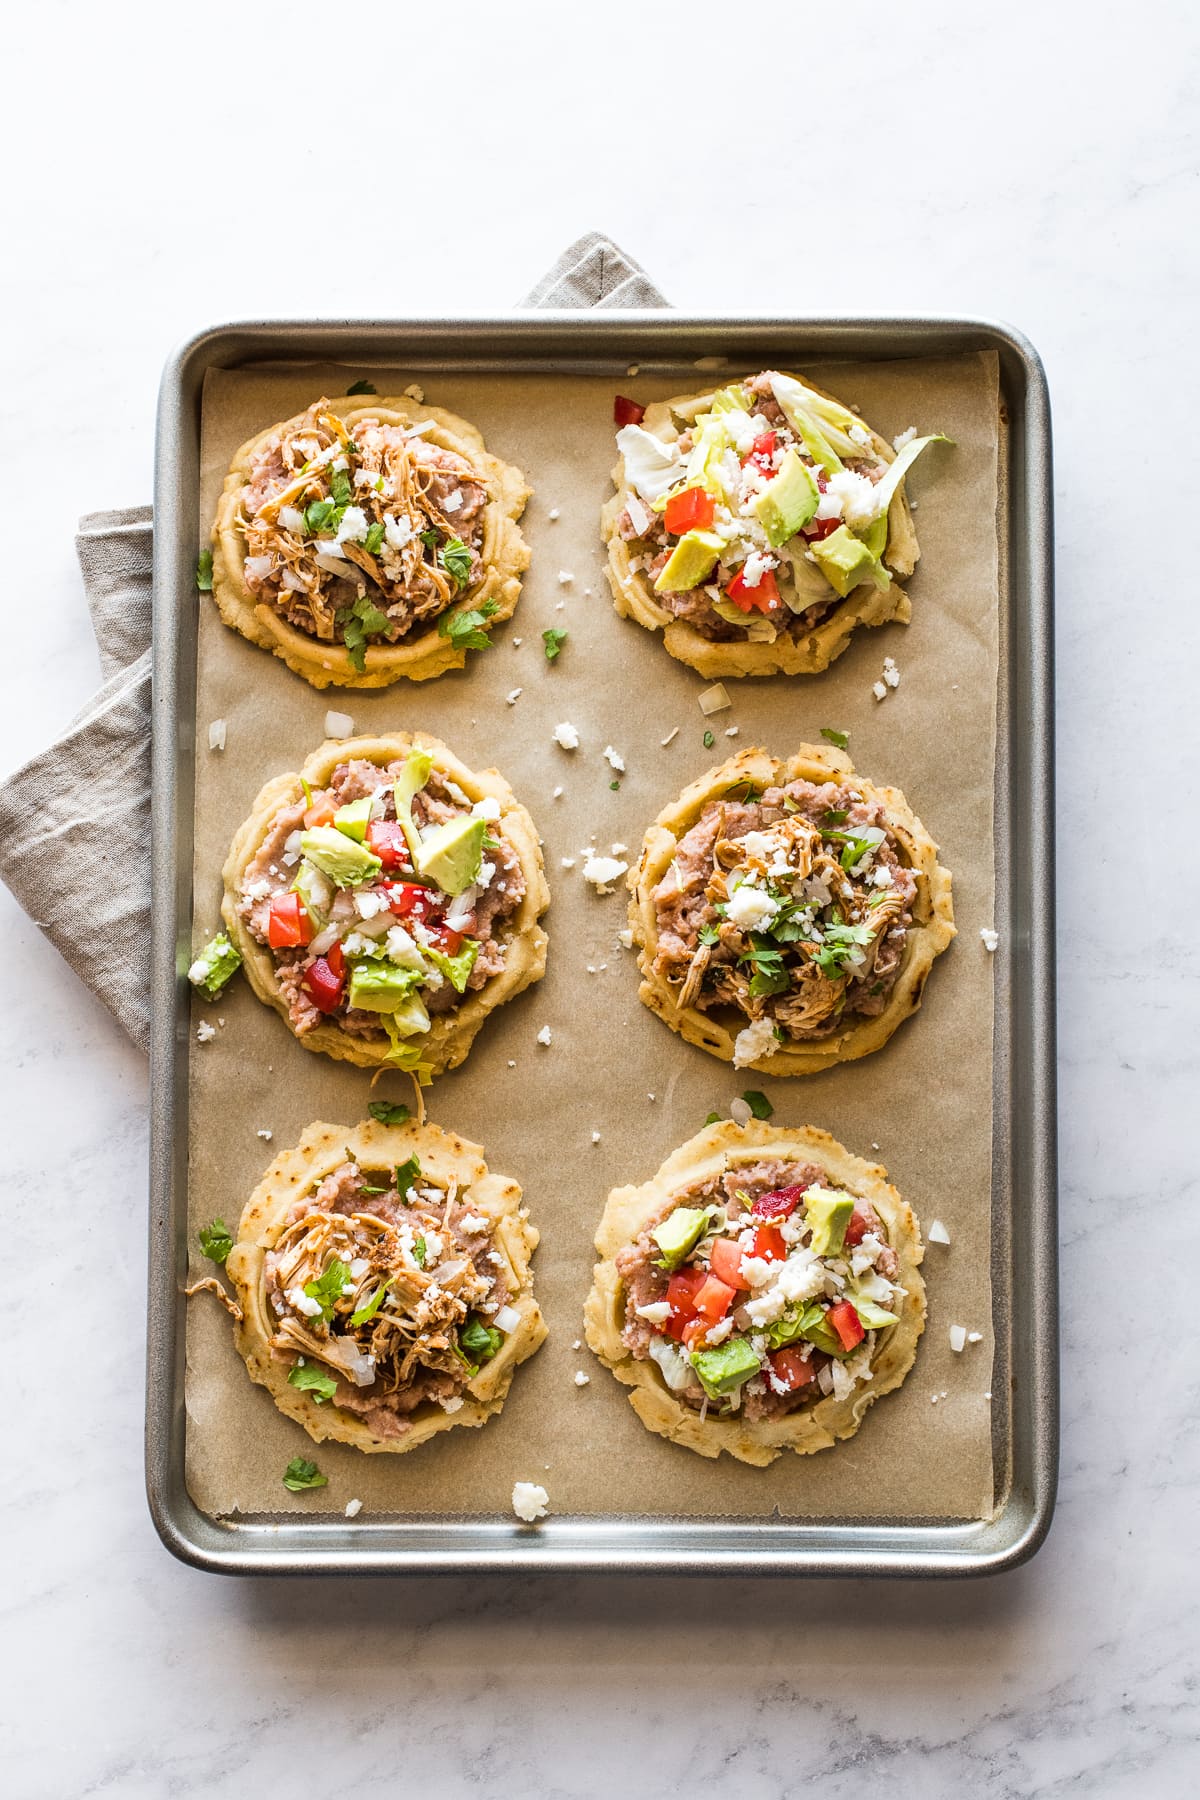
You can put just about anything on sopes, which is exactly why my parents made them so often. Start with a layer of refried beans so everything else has something to stick to, then build from there.
- My parents’ go-to: Refried beans, cheese, and ground beef, shredded chicken or picadillo.
- My favorite: Refried beans and chorizo, or papas con chorizo.
- Other meats: Carnitas, birria, barbacoa, or carne asada.
- To finish: Shredded lettuce or cabbage, crumbled queso fresco, diced onion, cilantro, and a spoonful of chile de árbol salsa.
They’re also a great way to use up any Mexican leftovers sitting in your fridge.
Frequently Asked Questions
Not at all. My parents almost always made them the no-fry way: after pinching the rim, just put them back on the hot griddle for another minute per side. They come out slightly crisp outside and soft inside. Frying makes them extra crispy, but it’s optional.
Yes. Once they’re seared and pinched, spray them with cooking spray and bake at 400°F for about 5 minutes. It’s the easiest way to finish a big batch all at once.
Yes. You can press them with a heavy pan like a cast iron skillet, but I like using a glass baking dish so I can actually see the dough while I press. Either way, press down evenly so one side isn’t thicker than the other. That way the sopes cook evenly.
Usually the dough is too dry, so knead in a little more warm water until it feels soft and springy. They’ll also crack if you wait too long to pinch the rim, so shape them while they’re still warm.
Mexican Sopes Recipe

Equipment
- Tortilla press or glass baking dish
- Nonstick skillet or comal
- Gallon-size zip-top bag or parchment paper
Ingredients
- 2 cups masa harina
- 1 teaspoon fine salt
- 1 ½ cups warm water, plus more as needed
- 1 to 2 cups vegetable oil, optional, for frying
- cooking spray, for baking
Instructions
- In a large bowl, combine the masa harina and salt. Stir in the water until a dough forms.
- Using your hands, knead the dough until it fully comes together and all the water is absorbed, about 3 minutes. To make sure it’s ready, grab a small piece and roll it into a ball. Press down on it with a finger. If the edges of the dough crack, the dough is too dry. If the dough sticks to your skin, it’s too wet. Add more water or masa harina as necessary.
- Divide the dough into 12 equal portions, then roll each into a ball. Cover them with a clean, damp cloth or plastic wrap to keep the dough moist while you work.
- Heat a griddle or skillet over medium-high heat. While it heats, cut the seams off a gallon-size zip-top bag so it makes one large rectangle of plastic, or use 2 pieces of parchment paper.
- Lay the plastic or parchment on the open tortilla press and place 1 dough ball on the bottom half. Fold the other side over the dough and gently press. Peel back the plastic and transfer the dough to your hand. It should be a little thicker than a corn tortilla.
- Cooking 1 or 2 at a time, place the dough on the hot griddle and cook for 1 minute. Flip and cook the other side for 1 more minute.
- Transfer the dough to a cutting board or plate and let it cool for a few seconds, just until you can touch it. Pinch the edges all the way around with your thumb and index finger to create a rim. If it's too hot, use a kitchen towel to pinch and press the edges. Work while the dough is warm, since it cracks if it cools too long.
- Cover the formed sopes with a towel and repeat with the rest of the dough.
- To pan-cook: Return the sopes to the hot griddle and cook for 1 more minute per side.To bake: Preheat the oven to 400°F. Place the sopes on 2 large baking sheets, spray with cooking spray, and bake for 5 minutes.To fry: Heat the vegetable oil in a large skillet over medium-high heat. Fry the sopes 2 or 3 at a time, flipping often, for about 2 minutes until light golden brown. Drain on paper towels or a wire rack.
- Top with refried beans, cheese, shredded chicken or ground beef, lettuce, and salsa, and enjoy!
Notes
- Storage: Keep cooked sopes in an airtight container in the fridge for 3 to 4 days, or freeze for up to 1 month. Thaw frozen sopes overnight in the fridge. Reheat on a hot griddle, in the oven, or in a little oil until crisp, and add toppings right before serving.
- Make ahead: Wrap the dough tightly in plastic wrap and refrigerate for up to 2 days before pressing.
- No tortilla press? Press with a heavy cast iron skillet or a glass baking dish, which lets you see the dough. Press evenly so they cook evenly.
Nutrition
Nutrition information is automatically calculated, so should only be used as an approximation.
More Authentic Mexican Recipes
This post was originally posted in February 2016 and has been updated with more helpful tips and information.









I love how easy you make it look to make the sopes.
Question: if I plan to bake them, do they still need to be seared first?
Can’t wait to try some recipes, everything looks amazing!
This was my first time making Sopes. Wow, were they delicious and easy. And they came out perfectly.
I baked mine. They were crispy on the outside and soft on the inside. Cooked all the way through.
My husband informed me he would like these Sopes every week.
Thanks.
Can I use an air fryer to cook the sopes? Would you brush with a little oil first?
Hi Sarah! Ooh that would be interesting! We haven’t tried this in an air fryer but if you try it let us know how they turn out! Yes I would suggest brushing them with oil first.
So if I wanted to make like 6. When you adjust the count you get .86 cup of masa. How about keeping it to the basic measurements like cup tbls, tsp. If not I’ll have to ask google how much is .86 cup
Why dont u just make 7?
I use the cooked gorditas, the authentic enchilada sauce using the dried chillis that my mom taught me and her mom before Her. Dip in the enchilada sauce place on a plate top with cheese and onions you can stack them two at a time or single on a plate topped with a fried egg w/ side of rice and beans. Try it!
Hi Debra! That sounds really good! Thanks for the suggestion.
I use a wet/damp cotton kitchen towel, place 2 or 3 masa balls lightly flatten fold length wise over masa and using a smaller medium size dinner plate and gently flatten each one. Uncover place on a plate w/damp paper towel. Environmently friendly. I use that kitchen towel exclusively for that purpose only. Just wash it in sink and dry.
I like Debra’s suggestion about flattening the tortilla ball with a wet/damp towel and a plate. Many people don’t have a tortilla press.
I really enjoyed this sopes recipes. Keep up the good work 🙂
Love your recipes !
After graduating HS In 1980 in Southern California, myself & 2 friends backpacked through Mexico after crossing into Tijuana. We had so much fun, 2 weeks turned into ovet 3 months. We toured the country, not tourist areas. We were invited to stay over night on ranches and they refused to accept our money. We helped with ranch chores, learned real down home Mexican cooking. The people were all so kind & happy that we dared to venture & explore off the beaten path to see how Mexican families really live. They all were all so kind to us. I fell in love with REAL honest Mexican food.